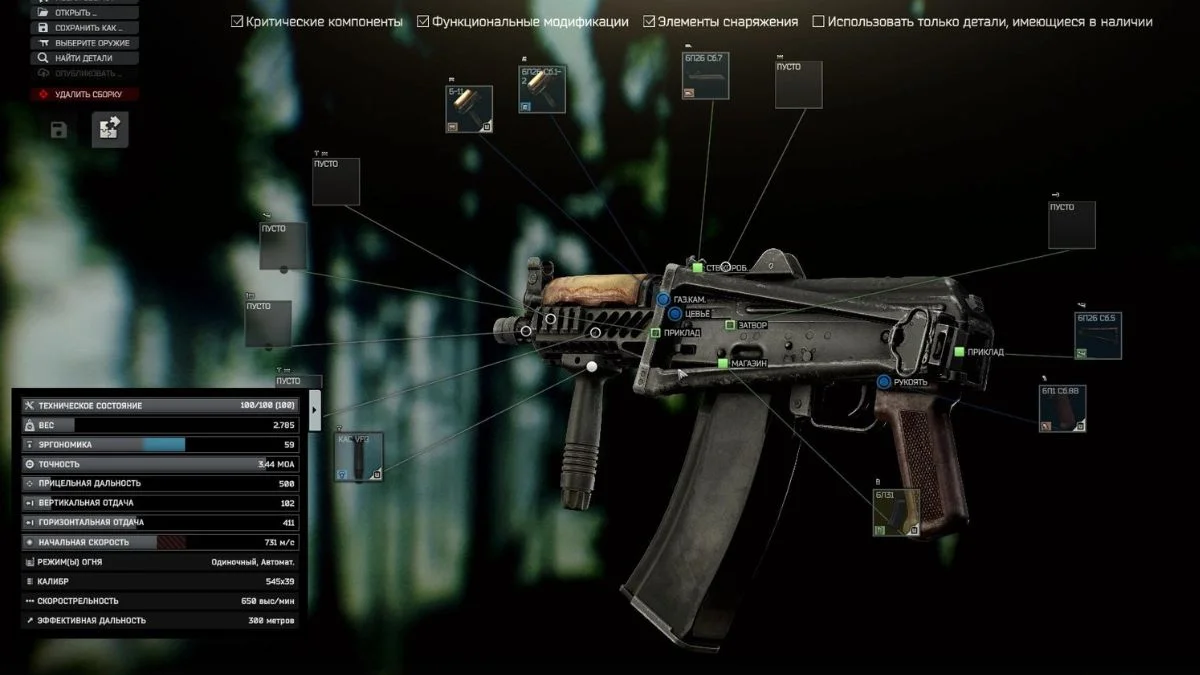
The Gunsmith Part 2 quest offered by Mechanic is notoriously difficult, even among Escape From Tarkov’s many difficult quests. For new players, it can be a daunting task to figure out all the specifics for building the ideal firearm. To help you complete the challenging Gunsmith Part 2 quest, we’ve laid out everything you need to know, from the prerequisites to the list of items you’ll need, to a detailed walkthrough of the assembly process.
Gunsmith Part 2 Quest Details
In order to move forward in Escape From Tarkov, players must complete Mechanic’s Gunsmith Part 2 quest. Like its predecessor, Gunsmith Part 2 requires the submission of a customized version of the AKS-74U. The submitted AKS-74U must meet the following criteria in order to be accepted by Mechanic:
- Zenit B-11 handguard
- 60-round magazine
- No more than six slots
- Over 58 ergonomics
- Less than 550 overall recoil (horizontal and vertical combined)
- Sighting range over 100
- 3.5kg or less
- Over 60 durability
It’s crucial to note that while Mechanic doesn’t explicitly mention the durability requirement, the AKS-74U won’t be accepted without meeting this criterion. While players can acquire an AKS-74U from Prapor after completing the Debut quest or the Escape From Tarkov flea market, Mechanic provides a brand new one upon accepting the quest. In exchange for 4000 EXP, 60,000 Roubles, 2 capacitors, 2 bundles of wires, and a 0.02 increase to the Mechanic reputation, players at level 11 or higher can begin this quest.
Escape From Tarkov Gunsmith Part 2 Required Items
Acquiring certain components for the AKS-74U is necessary to complete the Gunsmith Part 2 quest. The following items are required for use with Mechanic’s standard issue AKS-74U:
- AKS-74U Zenit B-11 handguard
- AK-74 5.45×39 6L31 60-round magazine
- KAV vertical foregrip
- AK polymer pistol grip (6P1 Sb.8)
While the Peacekeeper foregrip and Prapor LL1 pistol grip are readily available, the Zenit B-11 handguard presents more of a challenge to acquire. Skier on LL1 will sell it to you, and the Mechanic will exchange it for two D batteries and a green battery. The most significant hurdle comes with the 6L31 60-round magazine, available only at Prapor LL2 or through the Lavatory in the Hideout using four 6L23 30-round magazines, one KEKTAPE, and a Flat Screwdriver (long).
How To Assemble The Weapon
Now that we have everything we need, we can begin putting together the customized AKS-74U. The process is simple whether you use the Workbench in the Hideout or build from scratch.
- Remove existing handguard: Take care not to lose the gas tube when you replace the handguard.
- Replace with Zenit B-11 handguard: The Zenit B-11 should replace the weapon’s stock handguard.
- Attach KAV foregrip: The KAV vertical foregrip should be fastened once the new handguard has been installed.
- Swap pistol grip: AK polymer pistol grip (6P1 Sb.8), in place of the original wood or rubber one.
- Replace 60-round magazine: The AK-74 5.45×39 6L31 60-round magazine should be substituted if one is already installed.
- Fold the gun: Fold the pistol to make it smaller or press the middle mouse button to expand it to the required size.
When you’re done making adjustments, head back to Mechanic to hand over the modified AKS-74U and collect your prizes.
Conclusion
It takes a lot of practice and ingenuity to get good at the Gunsmith Part 2 mission in Escape From Tarkov. The process of completing a quest, gathering the required pieces, and putting together the weapon may be difficult yet gratifying. If you follow this instructions, you’ll be prepared to take on Mechanic’s mission and make greater strides in the challenging environment of Escape From Tarkov.


