A dead car battery is one of the most common and frustrating problems drivers face, often happening at the most inconvenient times. Knowing how to jumpstart a car is an essential life skill that can save time, money, and stress. While the process may seem intimidating at first, understanding the reasoning behind each step makes it safe and straightforward. This detailed guide explains the jumpstarting process from preparation to post-start care, focusing on safety, clarity, and long-term vehicle health.
Understanding Why Car Batteries Die
A car battery provides the electrical power needed to start the engine and run essential systems. Over time, batteries lose their ability to hold a charge due to chemical wear, temperature extremes, and repeated discharge cycles. Common causes of a dead battery include leaving headlights or interior lights on, extreme cold or heat, infrequent vehicle use, corroded terminals, or an aging battery nearing the end of its lifespan.
When the battery voltage drops too low, it cannot supply the necessary power to turn the starter motor. Jumpstarting temporarily provides the energy needed to start the engine by borrowing power from another vehicle or a portable jump starter. However, jumpstarting does not fix the underlying battery problem; it simply allows the vehicle to run long enough to recharge or reach a service location.
When Jumpstarting Is Appropriate
Jumpstarting is appropriate when the battery is discharged but otherwise intact. Symptoms indicating a jumpstart may help include a clicking sound when turning the key, dashboard lights flickering or not illuminating, and the engine failing to crank. If the battery is physically damaged, leaking, swollen, or emitting a strong odor, jumpstarting should not be attempted due to safety risks.
Additionally, if the vehicle has been submerged in water or involved in an electrical fault, professional assistance is recommended instead of a jumpstart. Understanding when not to jumpstart is just as important as knowing how to do it.
Tools and Equipment Required
Having the correct tools ensures a smooth and safe jumpstarting process. The most commonly used equipment includes jumper cables or a portable jump starter. Jumper cables should be well-insulated, free of exposed wire, and long enough to reach between vehicles comfortably.
| Tool | Purpose |
|---|---|
| Jumper cables | Transfer power between batteries |
| Working vehicle | Provides electrical power |
| Portable jump starter | Alternative power source |
| Gloves | Hand protection |
| Safety glasses | Eye protection |
Portable jump starters are increasingly popular because they eliminate the need for a second vehicle and reduce connection errors. However, understanding traditional jumper cable methods remains valuable.
Preparing Both Vehicles
Preparation is a critical step that directly impacts safety. Both vehicles should be parked close enough for the jumper cables to reach but not touching each other. The engines must be turned off, and both vehicles should be placed in park or neutral with parking brakes engaged.
Before making any connections, inspect the batteries for visible damage and ensure that battery terminals are clean and accessible. Removing loose corrosion with a dry cloth improves electrical contact. All electrical accessories such as headlights, radios, and climate controls should be turned off to prevent voltage surges.
Identifying Battery Terminals Correctly
Car batteries have two terminals: positive and negative. The positive terminal is usually marked with a plus sign and often covered by a red cap, while the negative terminal is marked with a minus sign and typically black. Correct identification is crucial because reversing connections can damage vehicle electronics or cause sparks.
The negative terminal is often connected to the vehicle’s metal frame, known as grounding. Some vehicles recommend connecting the negative jumper cable to a metal grounding point instead of directly to the battery to reduce spark risk.
Correct Jumper Cable Connection Sequence
The order in which jumper cables are connected is essential for safety. Following the correct sequence minimizes the risk of sparks and electrical damage.
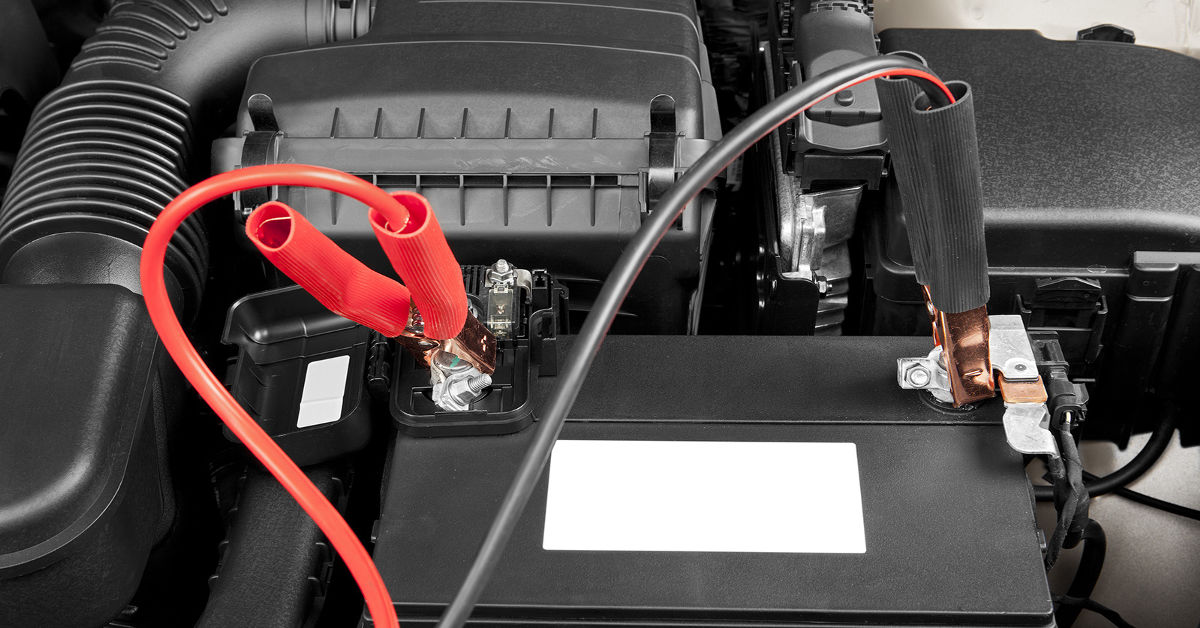
- Attach one red clamp to the positive terminal of the dead battery.
- Attach the other red clamp to the positive terminal of the working battery.
- Attach one black clamp to the negative terminal of the working battery.
- Attach the remaining black clamp to an unpainted metal surface on the dead vehicle, away from the battery.
This grounding step prevents sparks from occurring near battery gases, which can be flammable.
Starting the Vehicles
Once the cables are securely connected, start the engine of the working vehicle first. Allow it to run for a few minutes to transfer charge to the dead battery. This waiting period helps stabilize voltage and increases the chance of a successful start.
After several minutes, attempt to start the vehicle with the dead battery. If it does not start immediately, wait another minute and try again. Avoid repeated rapid attempts, as this can overheat the starter motor.
When the engine starts successfully, allow it to idle for several minutes before disconnecting the cables.
Proper Cable Removal Order
Disconnecting the jumper cables should be done carefully and in reverse order of connection to maintain safety.
- Remove the black clamp from the grounded metal surface.
- Remove the black clamp from the working battery.
- Remove the red clamp from the working battery.
- Remove the red clamp from the previously dead battery.
Ensure that cable clamps do not touch each other or any metal surfaces during removal.
Using a Portable Jump Starter
Portable jump starters simplify the process and reduce dependence on another vehicle. These devices contain a rechargeable battery designed to deliver high current for engine starting. Most modern units include safety features such as reverse polarity protection and voltage monitoring.
Using a jump starter typically involves connecting the red clamp to the positive terminal, the black clamp to a grounding point, powering on the device, and starting the vehicle. After starting, the clamps are removed, and the jump starter is turned off. While simpler, it is still essential to follow manufacturer instructions carefully.
After the Engine Starts
Once the vehicle is running, it should remain running for at least 20 to 30 minutes to allow the alternator to recharge the battery. Driving the vehicle is more effective than idling, as higher engine speeds generate more charging current.
If the vehicle stalls after turning off the engine, the battery may be too weak to hold a charge and likely requires replacement. Jumpstarting should not be used repeatedly as a long-term solution.
Common Mistakes to Avoid
Many jumpstarting issues stem from avoidable mistakes. Connecting cables in the wrong order, allowing clamps to touch, or attempting to jumpstart a damaged battery can result in injury or vehicle damage. Using thin or damaged cables can lead to poor electrical transfer and overheating.
Another common mistake is revving the working vehicle excessively. Modern vehicles do not require high RPMs during jumpstarting and doing so may stress electrical components.
Jumpstarting in Extreme Weather Conditions
Extreme cold significantly reduces battery efficiency, making jumpstarting more challenging. In cold conditions, allowing extra time for charge transfer improves success rates. Keeping jumper cables warm and ensuring solid connections are especially important.
In hot climates, battery fluid evaporation and corrosion are more common. Jumpstarting in heat requires careful inspection for swelling or leaks before proceeding.
Jumpstarting Different Vehicle Types
Not all vehicles are jumpstarted the same way. Hybrid and electric vehicles often have specialized battery systems and should not be jumpstarted using traditional methods unless specified by the manufacturer. Diesel vehicles may require higher current and longer charge times.
Always consult the vehicle’s manual when jumpstarting unfamiliar vehicle types to avoid damage.
Safety Precautions to Always Follow
Safety should never be compromised during jumpstarting. Wearing gloves and eye protection reduces risk from sparks or battery acid. Never smoke or use open flames near batteries. Keep children and pets away from the area.
If at any point the process feels unsafe or unclear, stopping and seeking professional help is the best choice.
Battery Maintenance to Prevent Future Jumpstarts
Regular battery maintenance reduces the likelihood of future jumpstarts. Keeping terminals clean, ensuring secure connections, and replacing aging batteries proactively improves reliability. Limiting short trips and using a battery maintainer for infrequently driven vehicles can also extend battery life.
Monitoring warning signs such as slow engine cranking or dim headlights allows early intervention before complete battery failure.
Comparison: Jumper Cables vs Portable Jump Starters
| Feature | Jumper Cables | Portable Jump Starter |
|---|---|---|
| Requires second vehicle | Yes | No |
| Ease of use | Moderate | High |
| Portability | Low | High |
| Safety features | Limited | Advanced |
| Cost | Lower | Higher |
Both options have advantages, and choosing one depends on driving habits and preparedness preferences.
Environmental Considerations
Proper battery disposal and recycling are important environmental responsibilities. Dead batteries contain hazardous materials and should always be taken to authorized recycling centers. Many automotive retailers accept used batteries and ensure safe disposal.
Reducing unnecessary jumpstarts and maintaining battery health also reduces waste and resource consumption.
Final Thoughts on How to Jumpstart a Car
Learning how to jumpstart a car is an empowering skill that enhances driver independence and safety. While the process involves electrical components and safety considerations, following a structured approach ensures successful outcomes. Jumpstarting should be viewed as a temporary measure that allows drivers to address underlying battery issues promptly.
By understanding why batteries fail, how to connect equipment safely, and how to care for batteries afterward, drivers can avoid repeat incidents and maintain reliable vehicle performance. Preparedness, patience, and attention to detail are the keys to mastering this essential automotive skill.
Frequently Asked Questions
1. How long should I let the working car run before starting the dead one?
Allow at least three to five minutes for initial charge transfer before attempting to start.
2. Can jumpstarting damage my car?
When done correctly, jumpstarting is safe, but incorrect connections can damage electronics.
3. How often can I jumpstart a weak battery?
Repeated jumpstarts indicate battery failure and replacement should be considered.
4. Is it safe to jumpstart in the rain?
Yes, if connections are kept dry and proper precautions are followed.
5. Should I replace my battery after a jumpstart?
If the battery continues to lose charge, replacement is recommended for reliability.